February 20, 2014

Some leftovers!

After doing several posts in a row last month, I realized I still had a couple of photos on my desktop that I forgot to blog about, so this will clean up that problem!

First of all:

I made these cute octopus hats for the twins.  I did follow the pattern, checked my gauge, but they did come out a little bit to big for 6 month olds.  But they are cute and they will grow into them!

Another thing I did prior to Christmas was to make fabric letters of the babies' names:

They are just two layers of fabric with some stiff fusible interfacing inside and I just satin stitched around the outside.  I had no idea what mom and dad would do with them, but they were fun to make.  As it turns out, the babies' love them!  They have been played with a lot, drooled on, and soon they will be chewed on!  (Each of the twins has two teeth!)  I hope they are non-toxic!  It's fun to get photos and videos of the little ones' enjoying their letters!

And finally, a little follow up to the silkies blog posting.  Here's Anja enjoying her silkie!

The babies always make me smile!

Trying out a new craft...

This winter, during that spell of bad weather and extreme cold, I was missing my weekly golf outing and I just happened to see and advertisement for a stained glass class at Opportunity House in Hendersonville.  I have passed by Opportunity House many times on my travels to and from Hendersonville, always a bit curious about what they had to offer for "seniors," and so the timing of this class gave me a chance to dabble in a new craft and find out more about OH.

As it turned out, I joined a class already in progress... the website clearly stated that the class was starting in January, but it had actually started prior to the holidays and so I was able to pay a pro-rated fee and leap in!  I had 5 sessions, which I thought might be enough, but I guess I was being too optimistic about what I could accomplish in that length of time.  One thing that I have learned so far is that working with glass is very labor-intensive and time consuming.

The instructor, Cheryl, patiently guided me through the process of making the first two projects.  Through these exercises, I learned some basics of glass cutting (and the use of special pliers and scorers), shaping to fit a pattern, grinding, foiling, tinning and soldering, attaching hangers, and lastly polishing and applying patina.  So, they don't look like much, but they represent most of how I spent the first four classes.

Here's my apple, the first project:


I've just hung it up against the shade in my sun room for the purpose of this picture.  It's not real impressive because I was given a clear piece of glass for the apple and it actually took me three tries to finally cut out the rather circular shape of the apple.  So it's a good exercise to use a cheap, clear piece of glass for.  Curves are tricky.  We have a "scrap bin" of colored glass we can use and I was able to find a nice piece of amber for the stem and a dark green for the leaf.  As I was soldering, I realized that I actually attached my stem upside down, but it really doesn't matter.  Again, another learning experience!

The second project was this hummingbird:
I rummaged through the scrap bin to find appropriate colors and during the construction of this little fellow, I spend much of my time at the grinder, trying to fit these curved shapes together as accurately as possible.  That seemed to take forever!

Having mastered... well, not really "mastered"... I probably should say, after "completing" these two little sun catchers, I was able to start work on a project of my choice.

I decided that I wanted to make a traditional quilt block pattern, a variation of the Carolina lily.  I thought the nice straight lines would make this project a snap.  Actually, I was wrong again, and I might have been better off choosing something with a few more forgiving curves.

Here is my Carolina lily in progress:
It's pinned to my pattern on top of my cork work board.  The squiggly lines you see are actually on the pattern underneath the "leaves."  And the rest of the glass is covering up my pattern.  You can see some of the pieces have been copper-foiled.  The solder will adhere to the foil.  The other black marks are on the glass, put there to indicate placement or direction, but they will wash off.  You might also notice that my stem is two-toned.  That is not the glass, but due to the fact that I had altered the shape of my leaves, so the bottom part of my pattern is on white paper, while the remaining part of the pattern is actually a piece of light blue paper.  I believe that this block measures about 11 inches square.  I may add a border to it... or I may not... we'll see how it comes together.

So, in order to complete this project, I needed to sign up for the next series of eight classes.  Hopefully within the next couple of months you will see this completed project and perhaps the start of the next!


January 30, 2014

Stripping and Stringing

It only takes attendance at one quilt guild meeting to drive home the fact that quilters are a generous group.

There is a strong emphasis on charitable giving and many of my colleagues make a variety of fabric blankets and items that go to various groups.  We've made little blankets for preemies, newborn baby blankets for local babies born on National Quilt Day, blankets for veterans, blankets for military families, quilts for Alzheimer's patients, bibs for nursing home residents, Linus blankets, Habitat quilts, quilts to decorate the walls of hospice rooms... well, the list goes on and on and on.  I'm always impressed by the number and quality of the quilts that are donated through our guild.  Within our guild we have a very active group that puts together "kits," shares patterns, finds fabrics and batting for us to use or at least get started on a "community quilt project."  And once a year, in January, we have a working meeting where community quilts are actually constructed in a group setting.

Last January at the guild meeting, I started this quilt.  We were given a pile of 2 1/2 strips of various lengths that someone thought went together either by color or theme.  We were instructed to sew the strips together randomly and then cut them into 45 inch lengths and then sew the strips together until we had a quilt top that measured approximately 45 x 60.  Well, I switched some of my fabrics and sewed until I got the quilt top about the correct size.  That's as much as I accomplished at the meeting.
But I also had time to look through the fabric donations and found a piece of backing fabric that went along with the Asian theme of at least some of the fabrics in the quilt top.
Here you can see the backing fabric:
                                     
I brought the top and backing home and put it aside and it wasn't until this year's community quilt meeting was fast approaching that I finally sandwiched, quilted and bound the resulting quilt.

From this angle you can see that it is really more square than rectangular.  That's because the backing fabric was that size.  But I think it still came out pretty nice.  I wasn't able to go to the meeting this month, but a friend handed it in for me.  Better late than never!
                                     
I can't remember if these quilts were being made for a particular request, but I think that it would make a nice lap quilt for a lady, perhaps someone in the extended care facility at the local hospital.

My next project was a "string quilt."

When I was at the Houston Quilt Show, I signed up for a challenge to make a quilt for "Quilts Beyond Borders."  QBB is a group that provides quilts to children in need in under-served areas of the world where the warmth of a quilt is needed at night.  Lots of their quilts go to orphans in areas of the world like Ethiopia, Romania, Guatemala, Kenya, and most recently Syria.  We were encouraged to choose a fat quarter and let that inspire the kind of quilt we wanted to make.  Well, I chose a green piece of fabric, but it was really my friend Alice who provided the inspiration for the type of quilt I made.  She has been making "string quilts" with some of her scrap fabrics and so, I thought it was time for me to try out the technique.

I had some off white strips that I had cut for a past project and I acquired some precut strips of fabric from an estate sale I recently attended.  So here is what my first strip quilt looks like:
 I probably should have cropped this photo a bit since you are seeing a lot of my sunroom floor, but I think the arrangement of blocks looks like the "god's eyes" we used to make in Girl Scout Camp.  Interestingly enough, I forgot to use my green "inspiration" fabric!

I used a rather dark mottled red/black fabric that I had on hand for the backing.  Probably not the best choice for a child's quilt.  I thought it looked a bit dreary.  But I used some of my scraps to put some color accents in the back:
 The backing color is really more like the above photo, but this photo shows the entire back:
 I'm not sure why this picture makes it look like it has a kind of purplish cast.
And here's a close up so you can see how the blocks come together to form the pattern.
 And one last photo of the back that shows off some of the accent pieces and the meandering quilting.
It's interesting to think that this quilt will likely travel to a part of the world I will never have a chance to see!


January 26, 2014

On a roll...

...just like a sesame seed!  While gathering photos for the last two posts, I came across a number of recent projects that I hadn't posted.  So I thought I'd share a few, just so you don't think that I have been idle.

While in JoAnn's a couple months ago, a product caught my eye.  It was a chiffon-like fabric strip with scallops on one side and holes on the other side.  I can't remember what it was called, but the package said that it was long enough to knit a scarf.  You use the holes to knit, basically just like each hole was a stitch.  It's a little odd to get started, but then after just a few stitches you start to see a twirly, puffy boa appear.  It was fast and fun!  I've included a close up of one of the ends so that you can get a better idea of what the fabric looks like.  I worked on this during one of my bee meetings and one of the ladies went right over to JoAnn's and made one in hot pink for her three year old grand-daughter diva... she loved it!

While in Houston at the International Quilt Show, I saw several demos by Marlene Glickman (www.silkdyes.com) of a very simple silk dying product and process.  So, of course, I had to buy her product.  This is so easy.  I literally did the dying at my dining room table.  Here are a few of the scarves I dyed.  I gave a few away as holiday gifts, too.  

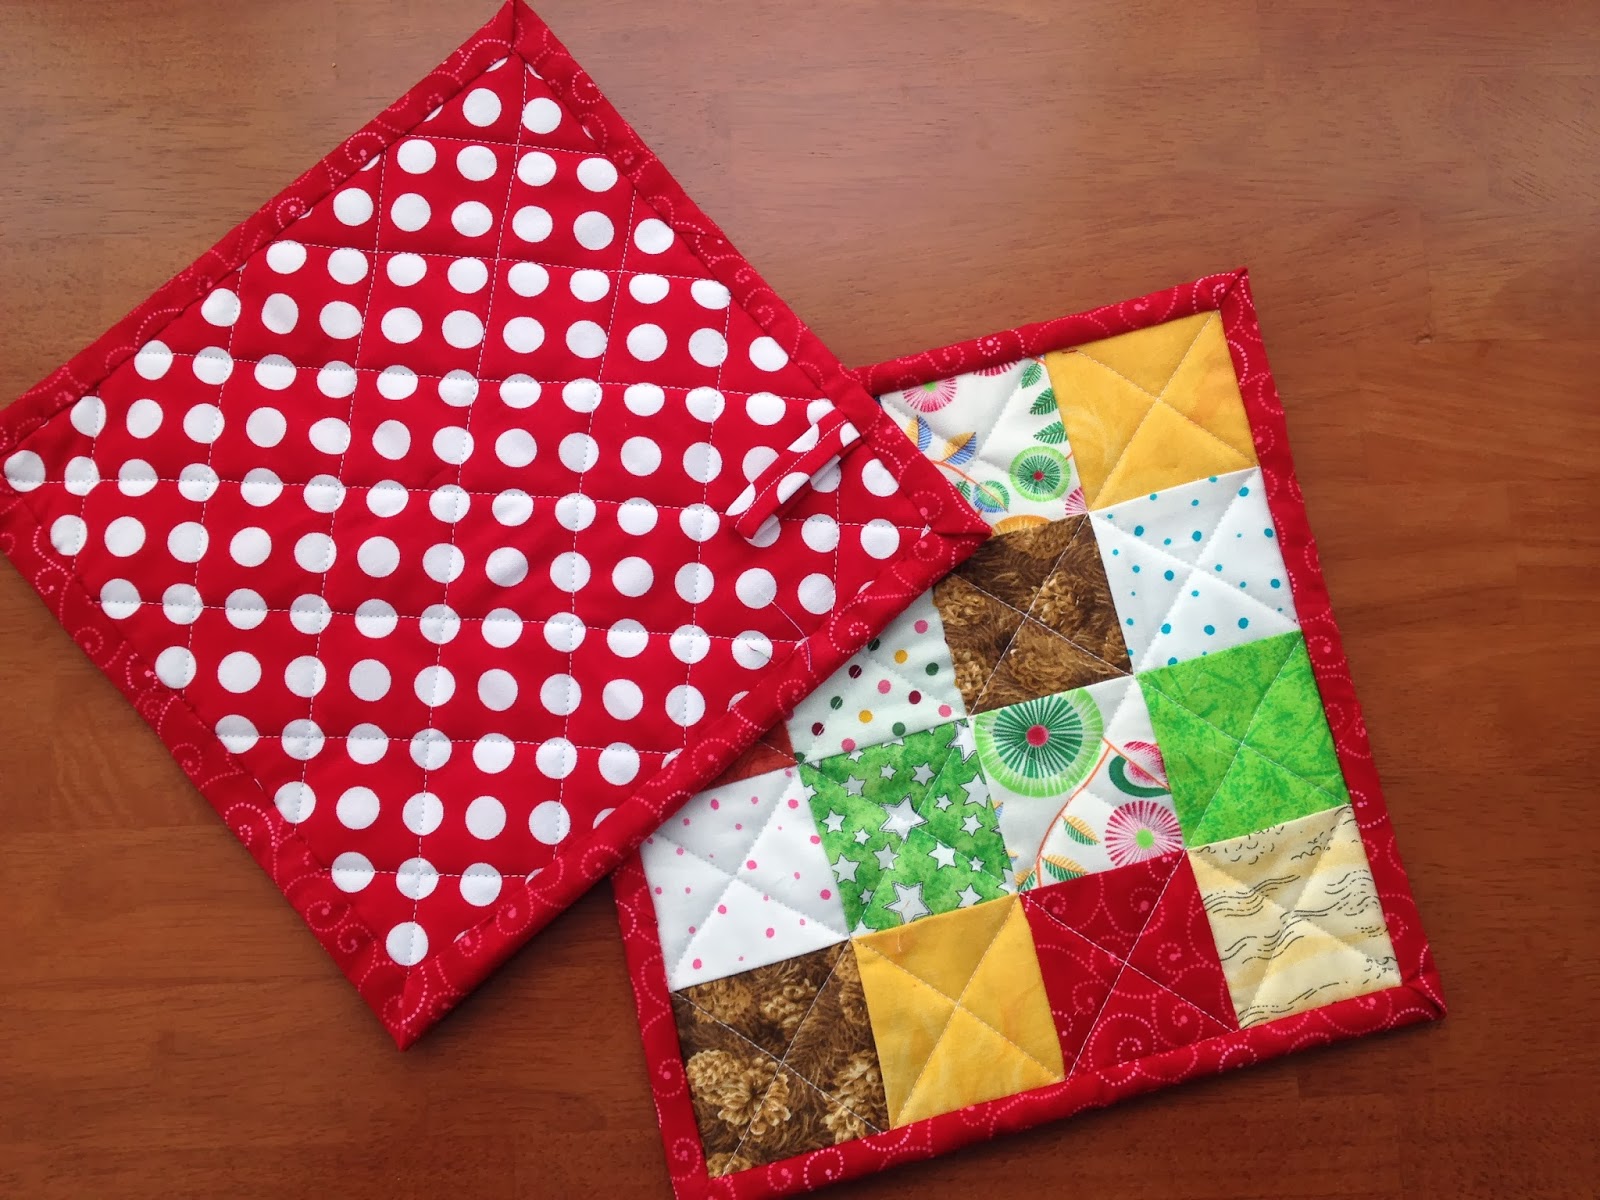
Also on the Houston trip I renewed my membership in the Quilt Alliance and I got a few little "gifts."  One of them was a stack of 2 1/2 inch fabric squares.  I forget how many squares were in the packet, maybe 20 or maybe 40.  Anyway, enough to get me thinking of making them into scrappy 8 inch squares that I then made into potholders. 
Again, they are nice little gift items.  Potholders always get pretty sad pretty quickly at my house, so new potholders are always welcome.  I think these are very cheerful.

 And I love the polka dot back.  Local people will recognize that as a Just Ducky fabric.
And my usual "busy work" while riding in the car or sitting in front of the TV is "no brain knitting."  These dish cloths are a perfect example.  They are made out of the sugar and spice type cotton yarn and I have accumulated a stash of it that I am trying to use up.  I like this particular pattern because it has texture on both the front and the back.  It seems to do a good job of picking up crumbs from my counter top.  
And just like pot holders, I find that dish cloths get pretty sad looking after multiple uses and washes, so it's always nice to have a new one.

And as I'm accumulating some finished cloths, I've been tucking them in this nice turned wooden bowl that our friend Ed made us for Christmas this year.  Didn't he do a lovely job?


Finally, some more pot holders.  Actually, I think these contain some of those original squares I was talking about.  I brought them to Maggie at Thanksgiving, along with a couple of lobster tea towels.  While in Maine this summer after the twins were born, I picked up this embroidery project at the local Maine store called Reny's.  It's one of those stores where you never know what you are going to find.  Well, I found a very appropriate embroidery project for Maine... lobster towels.  They were fun to do and maybe next summer I will be using one to wipe the butter off my chin when I eat a grilled lobster!


On a chilly day like today, it's nice to think about a lobster picnic!

Ben's Quilt

On December 27th, my brother's 9th grandchild was born.  So, I made him a quilt.

Of course, earlier in the year I heard that a baby was expected, knew he would be a boy for several months, and even knew that his name would be Benjamin.  But for a variety of reasons, the most likely one being the fact that I am great at procrastinating, I didn't start his quilt until his mother was having contractions!

I'm happy to report that his quilt is ready to be put in the mail on his one month birthday... could be a lot worse!

Here's his quilt spread out on my little sunroom table.  The quilt (and my table) measures about 40x40 inches.

I'm including a close up of the center block which has Ben's name, mostly because I think the square of blue fabric with the vehicles on it was leftover from Ben's brother Harry's quilt.
I was happy to find a similar vehicle print for the back of the quilt and, since I want the quilt to be lovingly used and worn out, I decided to not include a label, but just signed the front corner of the quilt.

                                     
So I hope Benjamin loves it!

January 25, 2014

Do you know what a silky is?

Last week Maggie asked if I might make a silky for little R.  It seems he likes to rub something on his face when he settles down to sleep.  Typically, what is at hand is his burp cloth, which is really a repurposed old-fashioned cloth diaper.  She thought it would be nice if he had something cool, smooth, pleasant and made for this purpose... and informed me that such "lovies" were referred to as "silkies."

So, I did an internet search and found a variety of little mini-blankets, ranging in size from about 14 inches square to 28x36 inches.  Generally they were made from satin (for it's smooth silky feel) and then something like fleece, flannel or some other fluffier fabric for contrast and likely stability, as well.  Seemed like an easy enough project!

I already had some cream colored minky cloth on hand.  For those of you who might not know what that is, it's a very soft, fuzzy, textured knit that I thought would be perfect for the non-silky side of the blankie.  I made a trip to the fabric store and bought a yard each of a deep pink and a blue satin that had a bit of flannel fiber on the back.  Having worked with slippery satin in the past, I figured that if one side had a little "traction" it might make things easier, and it did.  I decided on making my silkies 18x24 inches.  I could easily get two of each color out of the single yard pieces, allowing for a nice deep fold-over binding.  I also had enough minky cloth for four blankies this size.  I also decided to put a layer of batting in each.  Since these items are likely to need frequent washing, I just thought that the batting would help support the stitching and give them a little firmer feel.

So, here they are:


... and a close up to show the nice texture in the minky cloth.


I hope little R and little A like them!


And here I am, trying them out...
... they do feel nice!  Perhaps I need to make one for myself!


October 14, 2013

More Arts and Crafts

A couple posts ago I said I would update you when I finished my Laura Wasilowski-esque fused fabric art for above my fireplace.  At that point, I had all the fabric fused in place and some embroidery embellishment, but I felt that I needed to add some additional interest in a couple places.  Of course I forgot to take a picture of the beading until after I had it mounted under glass...
I added the vertical line of brown beads on the light brown fabric on the left side of the picture.  The beads actually have the rich dark brown, but also some hints of beige and red, so they coordinated well.  And then, a bit harder to see are the three arcs of bone beads with a red seed bead anchoring them on the bottom green panel.  I think if you click on the picture you can enlarge that area to see that detail.  It's subtle, but I think it works.

And here is the finished piece hanging above my fire place.
I'm pleased with it!  I think it fills the space nicely and when I get tired of it, I can make something else for the spot.  :-)

And while I'm on the topic of little works of art, I thought I would share the two fabric post cards that I made to donate to Pokey Bolton's fund raising effort at the Quilt Show in Houston.  Each of these is post card sized, 4 x 6 inches.  The deal is that Pokey will sell the post cards to raise money for a non-kill shelter that she supports in the Houston area.  I guess she did this last year and raised a lot of money, so she has decided to try it again and double her goal!  I hope she's successful.

I suppose that pet-themed post cards are most popular, so I sketched this cat based on a photo that I saw in Real Simple Magazine.
 I'm not really a "cat person" but I thought the blackish cat on the orangish background looked very appropriate for Halloween and I named it "CATitude."

Then I also made a more generic post card, which actually could be sent to someone to offer them good wishes.
It's a fortune cookie with several actual "fortunes" surrounding it.  Again, I think if you click on the picture you can likely read them... they are good fortunes and hopefully lucky numbers, so of course I called it "Good Fortune."

I've been traveling a lot lately and haven't spent much time in my sewing room, but it's nice to have some small, quick projects to show you.